
Key Takeaways:
- Pavement may seem small, but it can make or break your property.
- Cracks are one of the most common problems that asphalt pavements face as they age.
- These cracks can cause further damage and impact the lifespan of your pavement if left untreated.
- Many types of cracks form on the pavement, including alligator cracks, edge cracking, longitudinal cracks, transverse cracks, block cracking, and rutting.
- Crack treatment is vital to keep your pavement in good condition and prevent further deterioration of the asphalt surface.
- Some common ways to treat asphalt cracks include crack filling, sealing, asphalt patching, seal coating, and asphalt overlays.
When it comes to our properties, we want to ensure that everything is perfect. We put much thought into the end design and want the landscaping and exterior to look great. But sometimes, we can forget about one of the most critical aspects – the pavement.
Pavement may seem small, but it can make or break your property. Think about it, a shoddy-looking driveway or parking lot can make a wrong impression on visitors or passersby. It could overall hurt your property value.
It is why being a property owner, you’re always looking for different ways to increase the lifespan of your pavement. While many factors go into determining how long your pavement will last, one key factor is crack treatment.
Treating cracks early on prevents them from growing and causing further damage to your pavement. Purcell’s Paving and Masonry discuss the benefits of crack treatment and how you can get started.
How Do Cracks Occur on Asphalt Pavement?
Asphalt driveways and parking lots are built to last. Proper maintenance can last for more than 15 years. However, cracks will eventually appear due to external forces like sun exposure, heavy traffic, and extreme weather conditions. Cracks are one of the most common problems that asphalt pavements face as they age.
Other than that, reports indicate that poor-quality materials and construction processes are among the most common causes of pavement cracking.
If you leave them untreated, these cracks can cause further damage and impact the lifespan of your pavement. Proper crack treatment is essential to avoid this type of situation.
What Types of Cracks Form on Asphalt Pavement?
The type of crack on a pavement surface depends mainly on environmental factors such as temperature fluctuations and moisture levels in the environment or from underneath the asphalt layer. Here are some of the types of cracks that form on the pavement:
1. Alligator Cracks
They form when large pavement sections become brittle and crack in a pattern of interconnected shapes resembling alligator skin.
2. Edge Cracking
These occur near the edges of the pavement surface and can be caused by poor drainage, lack of support at joints, and shrinkage due to temperature changes.
3. Longitudinal Cracks
These are parallel cracks that run along the direction of travel. They are generally caused by shrinkage during cooling after being laid or traffic loading on the pavement surface.
4. Transverse Crack
These are perpendicular cracks that form across the pavement’s surface and can be caused by reflective cracking from an underlying layer such as a base course layer or subgrade soils.
5. Block Cracking
These appear as interconnected cracks that form large rectangular shapes on the surface and are caused by asphalt shrinkage on the pavement due to insufficient thickness or aging.
6. Rutting
It is a type of deformation where wheel paths become indented in the pavement’s surface, which can be caused by traffic loading or inadequate compaction.
How Can You Treat Asphalt Pavement Cracks?
Crack treatment is essential to keep your pavement in good condition. The goal of crack treatment is to seal the cracks and prevent further deterioration of the asphalt surface. Here are some common ways that you can treat asphalt cracks:
1. Crack Filling
It involves filling the cracks with a specialized material to prevent water from getting into the pavement and causing further damage. The treatment can treat early-stage cracks that develop in the pavement.
Crack filling is generally less expensive and will involve a smaller initial investment. Still, over time it may need to be redone more often than other treatments. Therefore, crack filling is usually performed on cracks that aren’t moving and is considered to provide only temporary relief.
2. Crack Sealing
This procedure involves applying a liquid sealant to the cracks that will form a barrier and help prevent water from entering them.
Although crack sealing is a more expensive option for the pavement owner, it provides a longer life expectancy of 8 years and is therefore considered a permanent treatment. In contrast, fillings may only last one or two seasons before needing to be replaced.
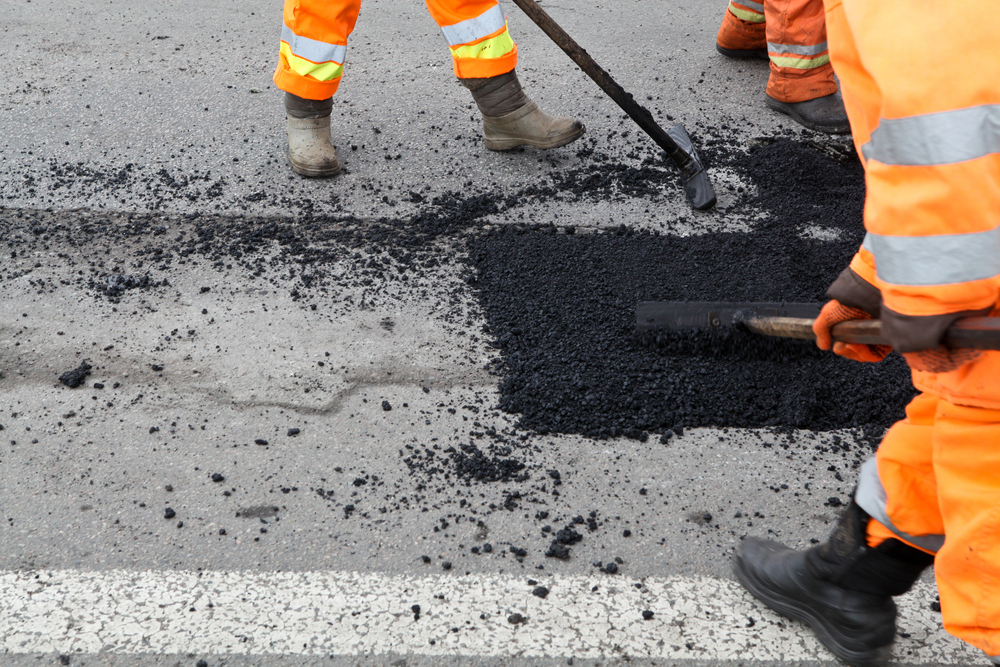
3. Asphalt Patching
Depending on the depth of the crack, asphalt contractors can also recommend using asphalt patching.
The process focuses on replacing a specific pavement segment and filling it with a new layer of asphalt. Depending on the fix, you could use a cold mix patch for a temporary fix, while for a permanent fix, choose a hot mix patch.
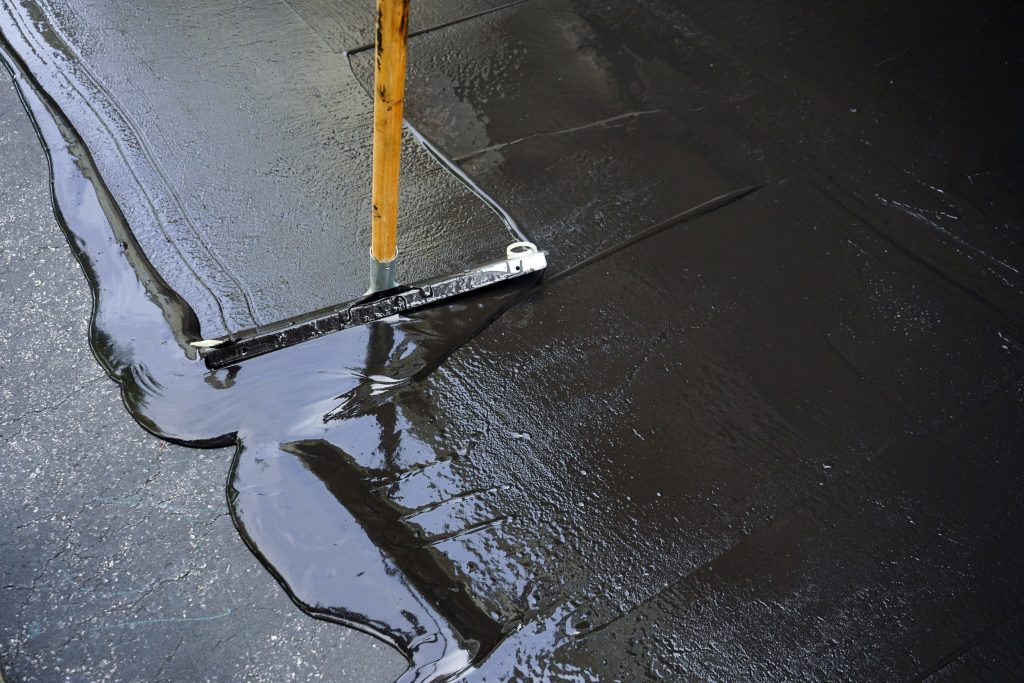
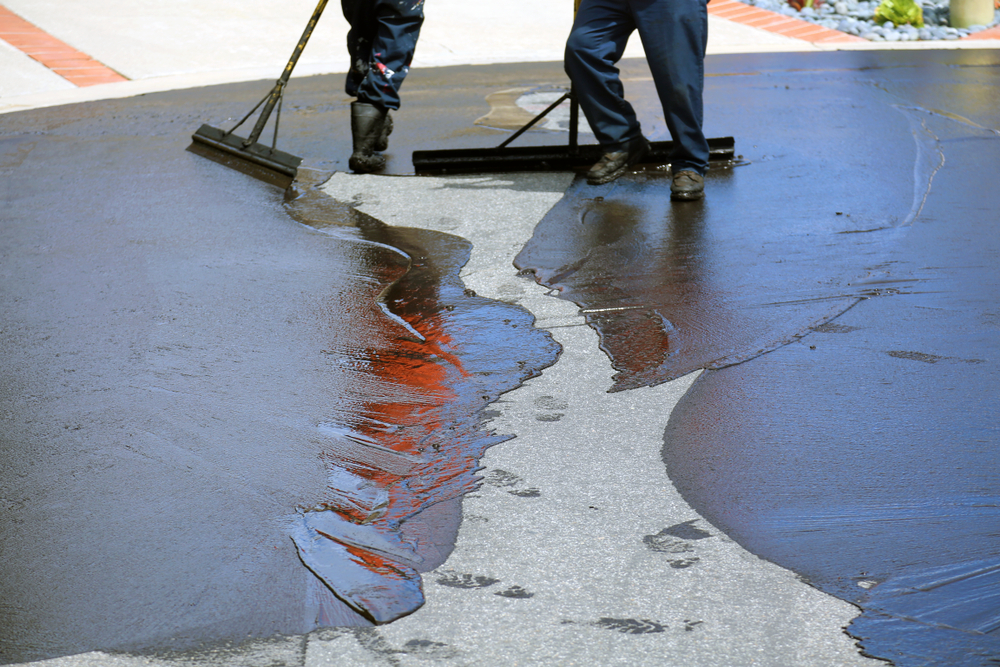
4. Seal Coating
This process is done by applying a protective coating over the pavement’s surface to protect it from ultraviolet rays, oil spills, and moisture infiltration.
The seal coat is more of a preventative measure that you could implement after repairing the asphalt pavement. Seal coat your parking lot or driveway every three years to improve its lifespan.
5. Asphalt Overlays
An overlay is when additional layers of asphalt are added to the existing surface and then compacted with a roller.
With a new layer of asphalt, you can ensure that your pavement is strong, durable, and will last for many years.
Also Read: 8 Critical Factors To Consider When Installing An Asphalt Driveway
Conclusion
Crack treatment is a great way to improve the lifespan of your pavement.
By understanding and addressing the different types of cracks that can form on an asphalt surface, you can protect your investment and keep it looking new for years to come.
Rely on Purcell’s Paving and Masonry in New Providence, NJ!
Cracks can be a hassle and can occur on any asphalt pavement. If you’re searching for a reliable and experienced asphalt contractor to assist with crack treatment, turn to Purcell’s Paving & Masonry in New Providence, NJ!
From repairs to new installation, we are your one-stop shop for all things asphalt. We will take care of any repair problems you have and help design a driveway that installation meets all of your needs.
Contact us and get a free estimate today.

Key Takeaways:
- There are three types of driveway repair: patching, resurfacing, and replacement.
- Asphalt patching is quick and inexpensive, but patches are sometimes invisible.
- Resurfacing is more expensive than patching but can often be completed in just a few days.
- Replacement provides a long-term solution that you will only repeat for a few years.
- Signs that your driveway needs repair include cracks in the concrete, potholes, spalling, discoloration, and an uneven surface.
If you’ve been driving around your neighborhood, you may have noticed that many driveways and parking lots look like they need repair. There are a few different ways to repair them, but deciding which option is the best can take time. This post will look at the three most common methods for repairing driveways and parking lots: asphalt patching, resurfacing, and replacing. We’ll explain each one in detail so you can decide which is right for your property.
What Are the Different Types of Driveway Repair?
When it comes to driveway repair, there are three main options: asphalt patching, resurfacing, and replacement. Each option has its own set of benefits & drawbacks, and the best choice for your needs will depend on how severe the damage is.
Driveway Patching
Asphalt patching may be the best option if you have a few small cracks or divots in your driveway. Patching is quick and relatively inexpensive and can extend your driveway’s life by several years. However, patches are only sometimes invisible & they may not be able to withstand heavy traffic or extreme weather conditions.
Resurfacing
Resurfacing is a more extensive repair than patching but can also significantly increase lifespan. When your driveway is resurfaced, a new layer of asphalt is applied over the existing surface. This new layer provides protection against weather damage and wear and tear.
Driveway Replacement
If your driveway is severely damaged, replacement may be the only option. Although it is the most expensive driveway repair option, replacement provides a long-term solution that will not need to be repeated for many years. When you replace your driveway, the entire surface is removed and replaced with new asphalt. This ensures that your new driveway will be level, smooth, and free of cracks or divots.
Signs That Your Driveway Needs Repair
1. Cracks In Your Driveway
Cracks can occur for several reasons, including tree roots, shifting soil, and extreme weather conditions. If left unrepaired, cracks will only continue to grow and can eventually lead to the collapse of your driveway.
2. Potholes
Another sign that your driveway needs repair is potholes. Potholes are caused by water seeping into the cracks in your driveway and then freezing and expanding. This process weakens the concrete and leads to craters or potholes. Potholes can be very dangerous, as they can damage vehicles or cause injuries if someone were to trip and fall.
3. Spalling
Spalling is another common problem that can occur with driveways. Spalling occurs when the concrete surface begins to flake off or chip away. This is caused by exposure to salt, which can cause corrosion of the rebar or other metal reinforcement within the concrete.
4. Discoloration
If you notice that your driveway is beginning to change color, this could be a sign that it needs repair. The discoloration is often caused by stains from oil, grease, or other fluids that have been spilled on the driveway. Over time, these stains will penetrate the concrete and cause it to change color. In some cases, the discoloration can also be caused by efflorescence. This white powdery substance forms on the surface of concrete when water evaporates from within the pores of the concrete.
5. Uneven Surface
Another sign that your driveway needs repair is an uneven surface. Several factors, including settling soil, tree roots, or poor construction techniques can cause an uneven surface. A rough surface can be dangerous, as it can create trip hazards or cause vehicles to bottom out when driving over it. An uneven surface can also lead to water pooling on your driveway, further damaging the concrete or creating a breeding ground for mosquitoes & other pests.

How Do You Repair A Cracked Driveway?
Over time, the sun and rain can cause asphalt driveways to crack and crumble. While you can repair small cracks with a do-it-yourself asphalt patch, larger cracks require professional help left unattended; a cracked driveway can lead to serious problems, such as potholes or complete pavement failure.
To repair a crack in your driveway:
- Clean the area around the gap with a wire brush and shovel.
- Remove loose pieces of asphalt, gravel, or dirt from the cracks.
- Fill the crack with an asphalt repair caulk or sealant.
- Use a putty knife or trowel to smooth out the sealant.
- Allow the sealant to dry for 24 hours before driving on it.
Related: What to Do About Cracks in a Concrete Driveway?
How Do You Repair Potholes?
Potholes can be a nuisance, and they can also cause damage to your car. If you have a pothole in your driveway, you can take a few simple steps to repair it.
- First, use a shovel to remove debris or loose asphalt from the hole.
- Next, fill the void with sand or gravel, and tamp it down with a tamper or your foot.
- Once the hole is filled, mix up some cold-mix asphalt according to the instructions on the bag.
- Pour the asphalt into the hole, then use a trowel to spread it evenly.
- Finally, compact the asphalt with a tamper or your foot.
- Once the asphalt has been set, it will be strong enough to withstand traffic.
Following these simple steps, you can quickly and easily repair a pothole in your driveway.
Related: Sealcoating Standards – Do’s and Don’ts
How Much Will Driveway Repair Cost?
For small cracks and chips, you can expect to pay around $100. More significant damage, such as large cracks or potholes, will cost closer to $500 to repair. If your driveway needs major resurfacing, the cost can be upwards of $3,000. While this may seem like a lot of money, it’s important to remember that a driveway is a crucial part of your home’s infrastructure. Not only does it provide a smooth surface for vehicles to travel on, but it also helps to keep water and debris from flowing onto your property. As such, investing in regular maintenance and repairs can help prolong your driveway’s life and keep it looking its best.
Ready to add some curb appeal to your home?
A new driveway or patio from Purcell’s Paving and Masonry can do just that! We offer first-rate driveway and patio installation services, ensuring a high-quality finish in Berkeley Heights, NJ, that will last for years.
Our patios are top-quality, with a wide range of options. We can build patios in any shape or size you prefer to create the perfect space for your needs. Whether you want to make a place to relax or entertain guests, our patios are the ideal solution.
Key Takeaways –
- This holiday season, don’t let your chimney play spoilsport: spot potential problems and schedule chimney repair.
- Winter maintenance ensures the chimney and the fundamentals are well secured and in running order.
- Chimney health is essential to home repair and maintenance; your energy bills and savings depend on them.
- Without effective chimney maintenance, your chimney might face significant problems during the winter season.
- Purcell’s Paving and Masonry offer exclusive chimney repair services in Basking Ridge, NJ.
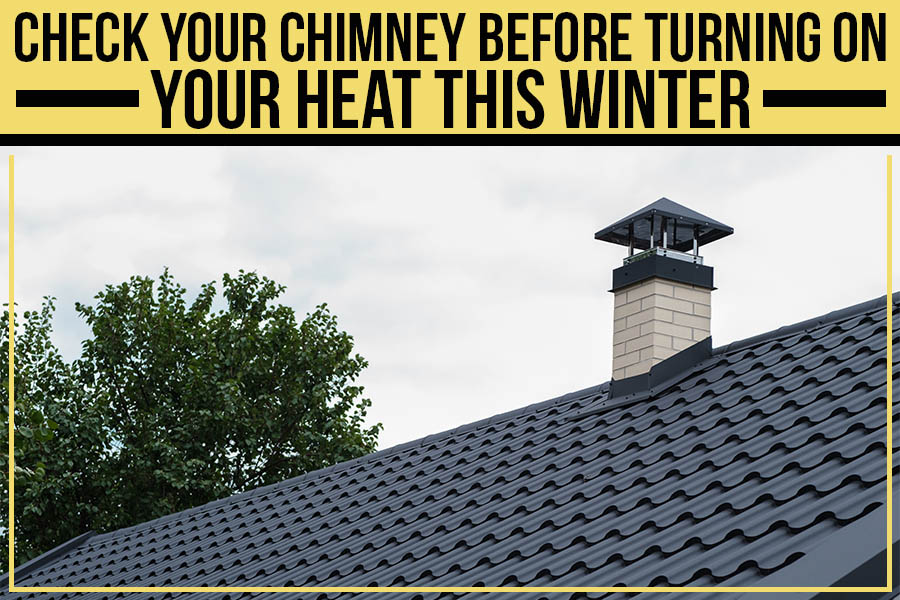
No one wants to start their heating season off with a fire, so check your chimney before turning on your heat this winter. Have a professional look and clean it if necessary to avoid any unnecessary damage or danger. Follow these simple tips to keep your chimney safe and functioning properly all winter.
Prepare Your House Before Lighting the Fireplace –
Before you get to the point of fixing your chimney, there’s some housekeeping you need to take care of.
1. Clear the Clutter Around the Fireplace
This one should be obvious, but it’s worth repeating. Ensure the area around your fireplace is clear of flammable, including items like newspapers, magazines, blankets, and pillows. The last thing you’d want is for your home to go up in flames because you didn’t take the time to clear away the clutter.
2. Inspect the Fireplace Gasket
Your fireplace gasket is a seal that helps prevent heat and fumes from escaping through cracks in your fireplace. Over time, these gaskets can become damaged or worn out, so it’s essential to inspect them regularly and replace them as needed. A quick way to check if your gasket needs to be replaced is to hold a piece of paper up to the crack. If the paper flutters or blows away, you know it’s time for a new gasket.
3. Replace the Batteries in the Carbon Monoxide And Smoke Alarms
This one is non-negotiable—if you don’t have working smoke and carbon monoxide alarms in your home, you need to install them immediately. And even if you have them, you should still replace the batteries at least once a year. It’s just good practice (and could potentially save your life).
Also, read – What to Ask Masonry Contractor Before Hiring?
How to Prepare Your Chimney for Winter?
Now that you’ve completed a roundup of all essentials, it is time to dive into the chimney lane to determine possible loopholes and fix them before they become a headache.
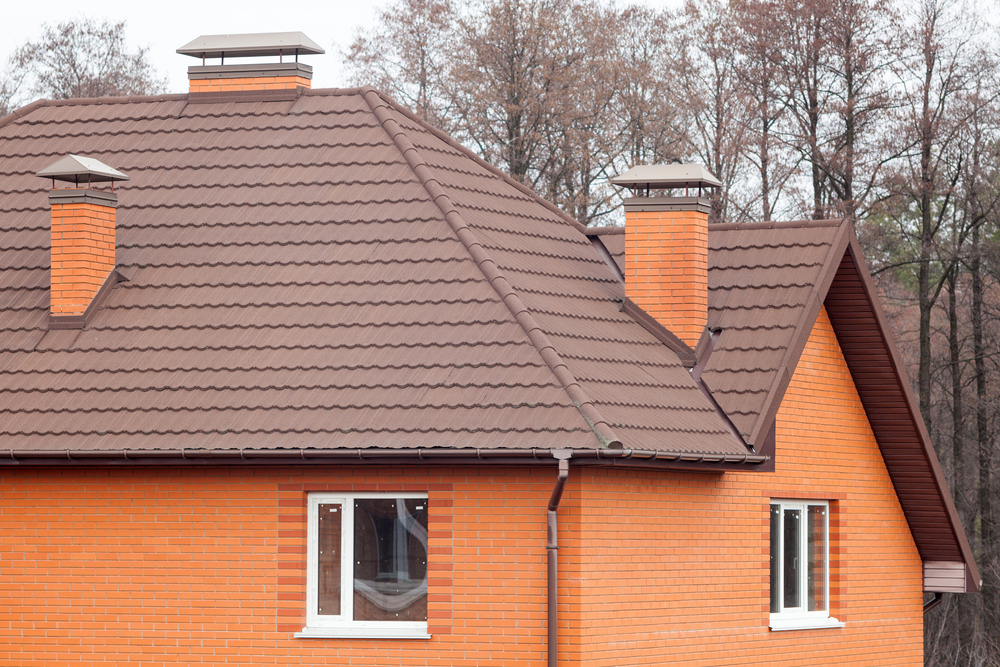
- Check your chimney cap. The chimney cap is the metal cover at the top of your chimney. It’s there to keep debris and animals out of your chimney. Ensure the cap is securely fastened and there are no holes or gaps.
- Inspect for damage. Take a close look at your chimney to see if there are any cracks or missing mortar. Repair any damage before winter sets in. Cracks and gaps can let cold air into your home and cause your heating bill to go up.
- Trim trees near the chimney. Overhanging branches can damage your chimney and cause blockages. Cut back any branches that are within 10 feet of your chimney.
- Check the damper function. The damper is a metal flap that covers the fireplace’s opening when it’s not in use. The damper prevents heat from escaping the chimney when it’s not in use. If it needs to be fixed, it can be very costly to heat your home during winter. Check the damper function regularly and have it repaired if necessary.
- Hire a chimney sweep. This is the most crucial point on the list! A professional chimney sweep will have the necessary tools and experience to clean your chimney properly. They will also be able to spot any potential problems you might need to be aware of. It’s best to hire a sweep once a year, preferably before you start using your fireplace for the winter season.
What Are Common Chimney Repair Problems During Winter?
Chimneys are notoriously finicky, and even the tiniest crack can cause big problems. So, before you light that first fire of the season, read on for tidbits you need to know about keeping your chimney in tip-top shape.
1. Cracks in the Chimney Crown
The chimney crown is the cement cap at the top of your chimney and plays a vital role in keeping water out. If there are cracks in your crown, water will seep in and cause severe damage to your chimney. The good news is that this problem is relatively easy to fix. You can either patch the crown yourself with a repair kit or hire a professional to do it for you.
2. Leaks in the Flashing
The flashing is the metal strip that seals the connection between your roof and your chimney. If there are gaps or cracks in your flashing, water can get into your home, causing all sorts of problems. To fix this, you’ll need to reseal the flashing with a waterproof sealant. Again, you can either do this yourself or hire a professional.
3. Missing Mortar Joints
Mortar joints hold bricks together, so if they’re missing or damaged, your entire chimney could collapse. To fix this problem, you’ll need to remove the loose mortar and replace it with new mortar mixed with water. Once dry, it would help if you sealed it with a waterproof sealant to prevent further damage.
4. Damaged Bricks
If bricks are cracked or damaged, they need to be replaced as soon as possible before more extensive damage is done. To do this, you’ll need to remove the damaged bricks and mortar and install new bricks and mortar. You should only attempt this if you have experience working with bricks; otherwise, you could cause more damage than you started.
As the weather continues to cool down and winter approaches, it’s time to start considering getting your home ready for the cold months ahead. One of the most essential things you can do to prepare your home for winter is to have your chimney checked and repaired if necessary.
Purcell’s Paving and Masonry offer exclusive chimney repair services in Basking Ridge, NJ.
So don’t wait – get a free estimate today and ensure your chimney is in good working order before you turn on your heat this winter!
Key Takeaways:
- Asphalt repairs fix small cracks, potholes, or other damages that have occurred on the surface.
- The repaired area will level with the rest of the asphalt and blend in smoothly.
- Repairs are usually the least expensive solution for fixing the damage.
- Repairs don’t take time since you only have to fix the isolated area.
- Resurfacing an asphalt surface can take days, while you can repair it in a few hours.
- With repairs, you can usually keep the area open to traffic while the repairs are being done.
- Repairing the cracks and crevices can help prevent water from causing further damage.
- Resurfacing your pavement can extend its lifespan.
- It can also improve drainage and prevent pooling.
- Resurfacing can also give your pavement a whole new look.
It’s no secret that all pavements require regular maintenance, whether made of asphalt or concrete. Depending on the traffic volume on the pavement and the climate conditions it’s exposed to, you may need to do something for its care. Simple things, such as seal coating every few years, or more significant repairs, such as patching or resurfacing, are ideal.
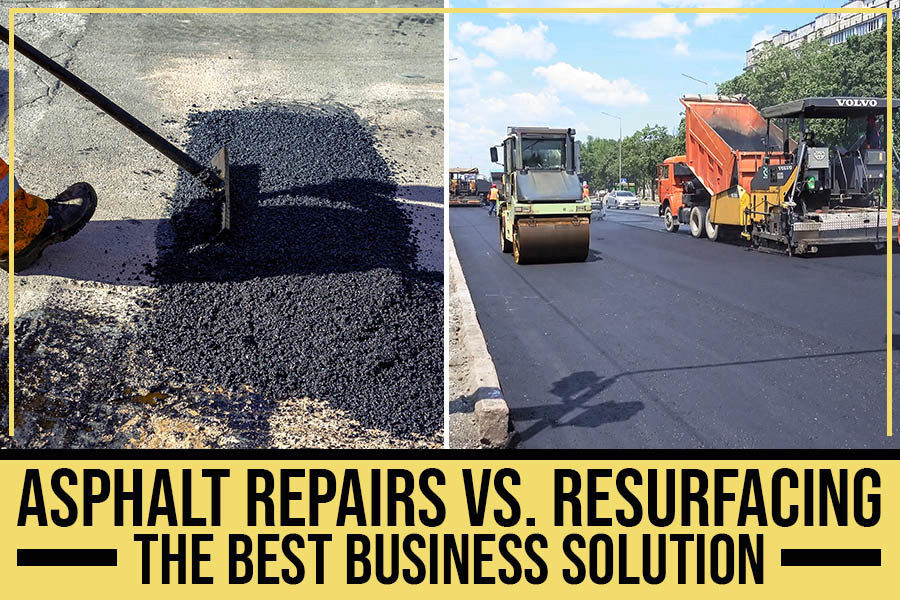
Suppose your asphalt is showing signs of wear and tear. In that case, you may wonder if you need to repair the damage or if it’s time for a more significant intervention, such as resurfacing. We’ll explain the differences between asphalt repairs and resurfacing in detail so you can decide on the right option for your driveway or parking lot.
Asphalt Repairs – What to Know?
Resurfacing is a great way to give your asphalt a new look and feel. It essentially creates a new layer of asphalt after removing the existing one. This new layer will protect the pavement from further damage and wear and tear. Resurfacing is a much more comprehensive solution than repairs and will usually last longer. It is important to note that a professional should only resurface.
Here are some benefits of asphalt repairs.
Least Expensive Solution
Repairs are the least expensive solution when it comes to fixing the damage. If the damage is small and isolated, you can repair that area without replacing the entire asphalt surface. This will save you a lot of money.
Less Time Consuming
Another benefit of repairs is that they are less time-consuming. You can usually have the repairs done in a few hours, whereas resurfacing an entire asphalt surface can take days. This is because you must remove the old surface before laying down the new one.
Less Disruption
Asphalt repairs are also less disruptive than resurfacing. You must close the area to traffic when resurfacing an entire asphalt surface. This can be a major inconvenience for businesses and homeowners. With repairs, you can usually keep the area open to traffic while the repairs are being done.
Prevent Water Damage
Another benefit of asphalt repairs is that they can help prevent water damage. Water is one of the biggest enemies of asphalt. When water seeps into the cracks and crevices of an asphalt surface, it can cause the surface to deteriorate. Repairing the cracks and crevices can help prevent water from causing further damage.
Asphalt Repairs are Durable
Asphalt repairs are also durable. When done properly, they can last for many years. Many repairs come with a warranty. If the repair fails within a certain time frame, you can get it fixed for free.
Environmentally Friendly
Another great thing about repairs is that they are environmentally friendly. Asphalt is a recyclable material. When you have an asphalt repair, the old asphalt is recycled and used to make new asphalt. This helps to reduce the amount of waste in landfills.
Asphalt Resurfacing – What to Know?
Resurfacing is a great way to give your asphalt a new look and feel. It essentially creates a new layer of asphalt after removing the existing one. This new layer will protect the pavement from further damage and wear and tear. Resurfacing is a much more comprehensive solution than repairs and will usually last longer. It is important to note that resurfacing should only be done by a professional.
The process of resurfacing begins with a thorough cleaning of the area. All of the dirt, debris, and vegetation must be removed. Next, the top layer will be removed. Once done, a new layer of asphalt will be applied. The thickness of this new layer will depend on the condition of the underlying pavement.
Here are some benefits of asphalt resurfacing.
Ensure Proper Drainage
One benefit of resurfacing is that it can help improve the pavement’s drainage. This is because the new layer of asphalt will be smooth and level. When water runs over the surface, it will not pool in any low spots. If water cannot drain properly, it will collect on the surface and cause many problems. Resurfacing will ensure that your pavement has proper drainage.
Aesthetics
Another benefit is aesthetics. If your pavement is old and cracked, it can make your property look unkempt. But with resurfacing, you can give your pavement a whole new look. The new layer of asphalt will be smooth and black, which will greatly improve the appearance of your property. It can make it look like you just had a brand-new driveway or parking lot installed.
Increase the Life of Your Pavement with Asphalt Resurfacing
It can also help increase the life of your pavement. The new layer of asphalt will protect the old base from the elements, which will prevent it from deteriorating as quickly. This can add 8 to 15 years onto the life of your pavement and save you a lot of money.
It’s More Affordable Than You Think
You might think resurfacing is too expensive, but it’s more affordable than you think. When you compare it to the cost of completely replacing your pavement, it’s quite a bargain. And when you factor in the increased life of your pavement, it’s even more affordable.
Make the Pavement Resistant to Damage
It can help make the pavement more resistant to damage from traffic. The new asphalt surface will be more resistant to ruts, cracks, and other types of damage. The increased durability can also help make the pavement last longer.
It’s Environmentally Friendly
Resurfacing is a very environmentally friendly option. It doesn’t require the use of any chemicals or solvents. No waste is produced, and the process doesn’t release any harmful emissions into the air.
It’s Quick and Easy
Resurfacing is also a quick and easy process. You can do it in a matter of days, which is much faster than replacing the entire asphalt pavement.
Conclusion
Many factors come into play when deciding whether to repair or resurface your asphalt. By taking the time to evaluate your specific situation, you can ensure that you make the best decision for your needs and budget. In general, however, repairs are typically more affordable and offer a quicker solution than resurfacing. However, resurfacing may be the best option if your asphalt is severely damaged.
Check out our blog post about tips for excavating a gravel driveway.
No matter what you decide, Purcell’s Paving and Masonry, serving Hillsborough, NJ, is here to help. We offer asphalt paving and repair services to our customers. Contact us today to learn more about our services or to get a free estimate!
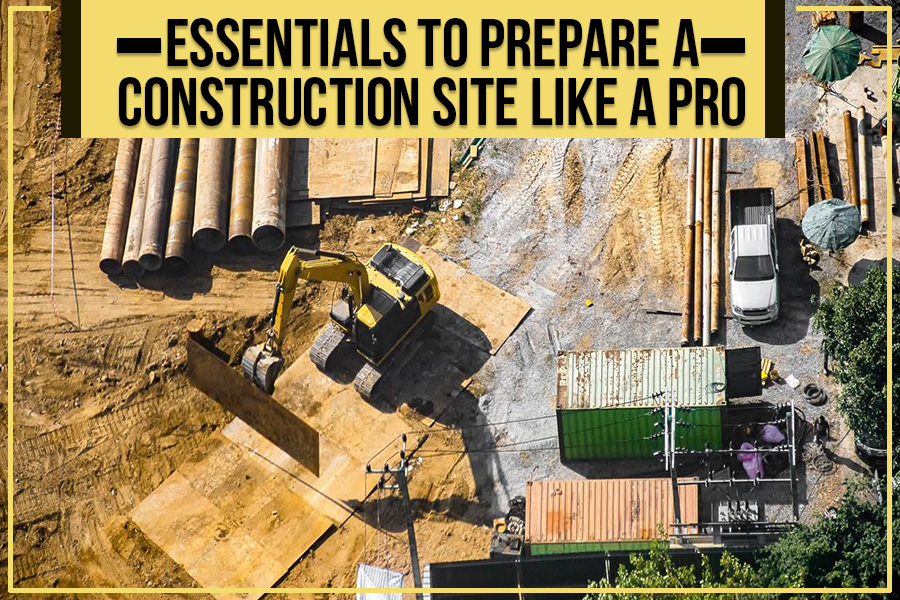
Essentials To Prepare A Construction Site Like A Pro
Key Takeaways:
- Construction sites can be dangerous if not managed properly. Follow the essential tips to keep yourself and those around you safe.
- Ensure the site is always clean and organized – this will help prevent accidents.
- Keep all tools and equipment in their designated place when they’re not in use.
- Be aware of your surroundings at all times, and make sure everyone on site is too.
- If something doesn’t seem right, speak up! It’s better to be safe than sorry.
Are you building or repairing something? Whether it’s your home, a deck, or a playground – construction projects are a regular part of life for many people. But things can easily go wrong if you don’t take care of the site preparation.
Here are some essential tips to help make sure your construction site is ready for business!
1. Clear the Site
The first step in preparing a construction site is to clear the area of any debris or obstructions. This involves removing trees, shrubs, or other vegetation from where you will be working. You may also need to remove existing structures, such as sheds or decks.
After the site is cleared, you will need to grade it. This involves using heavy machinery to level the ground so it is ready for construction.
2. Excavate the Site
The next step is to excavate the site. This involves digging out any areas used for foundations or other structures. It is important to excavate to the correct depth and width to stabilize the foundation.
If you are building a home, you must excavate the basement. To make a deck, you will need to excavate for the footings. Excavating is a big job and should be done by a professional.
3. Install Utilities
You should mark off utility lines before any excavation takes place. This will help avoid any damage to the pipes and keep workers safe. Then you must install utilities. This includes water, sewer, and electricity. If you are building a home, you will need to have the utilities installed before moving in. When building a deck, you must have the utilities installed before using it. This step is essential for ensuring that the construction site has all of the necessary amenities.
4. Prepare the Foundation
After you install the utilities, you can prepare the foundation. The process involves pouring concrete or setting up cinder blocks. Again, this step is crucial for ensuring that the construction site is stable and secure.
5. Erect the Framing
After the preparation of the foundation, you can begin erecting the framing. The skeletal structure of the building or deck will support the weight of the finished product. It is important to make sure that the framing is sturdy and well-constructed.
This will also help to keep trespassers out and also help to protect workers and equipment from accidents.
6. Set Up a Construction Entrance
A construction entrance is a designated area where construction vehicles can enter and exit the site without damaging public roads. This area should be large enough to accommodate all the cars you will use during construction.
7. Install Portable Toilets
You should install portable toilets for the workers and visitors to the site. This will help keep the work area clean and prevent the spread of disease.
8. Install Signs & Hire Security
It is also important to install signs around the construction site that warn people of potential hazards. These signs can help to prevent accidents and injuries on-site. If you are working on a large construction project, you may want to hire security guards to patrol the area. This will help to deter crime and also help to keep workers safe.
9. Install Street Signs
Street signs should be installed at all entrances to the construction site. These signs should include the name of the project, the contractor’s name and phone number, and the completion date.
10. Install Erosion Control
Erosion control is important for preventing soil erosion during and after construction. Various methods can be used for erosion control, including installing silt fences, straw bales, and hydroseeding.
These are just a few things you should do to prepare a construction site. By taking the time to do these things, you can help to ensure that the project goes smoothly and that everyone stays safe.

Safety Precautions While Preparing a Construction Site
Preparing a construction site is a dangerous job. Many potential hazards include heavy machinery, falling debris, and toxic chemicals. As a result, it is essential to take safety precautions to protect workers and bystanders.
- One of the most important steps is to create a safe work zone. This involves placing barriers around the perimeter of the construction site to deflect traffic and pedestrians. Barricades should also be set up around the perimeter of the construction site to keep pedestrians and vehicles out of the work area. You can make barricades from various materials, including wood, plastic, or metal.
- A storage area should be designated for all construction materials and equipment. This will help keep the work area tidy and prevent tripping hazards.
- Another important safety precaution is to set up lighting around the construction site. This will help workers see what they are doing and also help to deter criminals from entering the area.
- In addition, warning signs should be posted to alert people to the dangers of entering the work zone.
- Another key safety measure is to provide workers with personal protective equipment, such as hard hats and safety glasses.
These precautions allow site preparation for construction to be safe for everyone involved.
Conclusion
Site preparation is essential in any construction project – don’t leave it to chance.
At Purcell’s Paving and Masonry, we understand the importance of a well-prepared site. That’s why we offer comprehensive site preparation services in Somerville, NJ, to get your project and keep it there.
We’ll work with you every step, from developing a plan that meets your specific needs, clearing the land, grading it, and removing trees and stumps, to ensuring that your site is ready for launch on time and within budget.
Key takeaways:
- Seal coating is a cost-effective and efficient way to protect your investment.
- Before you start, do your research and prep work properly. This includes cleaning debris, filling in cracks or holes, and allowing the surface to dry completely.
- To avoid mistakes, calculate how much sealant you need ahead of time and stir it before each use. You should also test for moisture and use painter’s tape to create clean lines.
- Focus on coating one section at a time and allow the sealer to dry for 24-72 hours before using the area again.
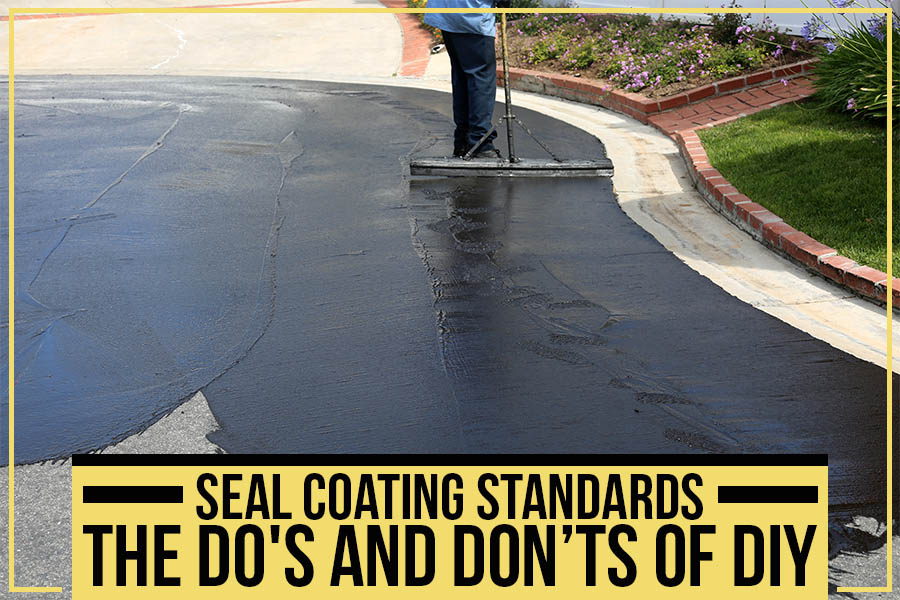
You love working in your own home. There’s something special and gratifying about taking care of your property yourself. From painting the walls to changing the lightbulbs, YOU can do it! Some tasks, however, should be left to the pros, such as seal coating your driveway.
Don’t worry; we’re not here to ruin your good time. Seal coating is an excellent way to safeguard your investment while saving money. But before you start slathering sealant all over your driveway, there are a few things you should know. This blog by Purcell’s paving, and masonry, will discuss the key dos and don’ts of seal coating your driveway.
Do Your Research:
You wouldn’t try to fix your broken washing machine without reading up on how first, would you? The same goes for seal coating your driveway. Before you start, research and study the best products and processes, and read up on which materials will work best for your specific type of driveway and climate. And ensure that you understand all the steps involved in properly seal coating your driveway before you begin. You don’t want an uneven, spotty finish because you skipped a critical phase in the process.
Don’t Forget About Prep Work:
Prep work is essential for any painting project; trust us, seal coating is no different! Once you’ve researched and gathered your materials, it’s time to prep your surface. Start by cleaning debris with a power washer or garden hose fitted with a nozzle attachment. Then fill in any lines, holes, or cracks with a crack filler or patching compound and smooth over with a putty knife until level with the surrounding surface.
Once that has had time to dry completely (follow the instructions on the packaging), go over any rough spots with a wire brush until they’re smooth before applying the seal coat. Suppose you don’t take care of these prep steps beforehand. In that case, all that hard work will likely be for nothing, as sealing over cracks and holes will only temporarily mask them instead of repairing them properly. And an uneven surface will give you an uneven finish. So, take the time to do it right!!
Do The Math:
Before shopping for sealant, calculate how much you’ll need ahead of time. That way, you won’t end up with too much (and waste money) or too little (and have to make a last-minute trip to the store in the middle of your project). To estimate how much sealant you need, measure the length and width of your driveway in feet, then multiply those numbers to get the square footage. Once you have that number, convert it into gallons by dividing by 250 (so one gallon will cover 250 square feet).
For instance: if your driveway is 10 feet long by 10 feet wide, it covers 100 square feet:
10 x 10 = 100 square feet ÷ 250 = 0.4 gallons.
So for this particular driveway, you would need close to one gallon of sealant. This number will fluctuate depending on the sealant you select, so read the package carefully before purchasing!
Don’t Forget to Stir Your Sealer Before Using It:
It’s important to stir (or shake if it’s a bucket) your sealer before each use so that all ingredients are evenly mixed. Otherwise, you risk having an uneven coat that falls short of your goals.
Do Test for Moisture:
Another mistake people make is sealing a damp driveway or parking lot. This will also cause the sealant to fail prematurely. Before you start your project, test the asphalt for moisture by sprinkling water on it—if the water beads up and doesn’t soak in, it’s too damp to seal, and you must wait for it to dry out completely before proceeding.
Don’t Forget to Use Painter’s Tape to Create Clean Lines:
Seal coating is messy, and despite your best efforts, some of the material is bound to end up where you don’t want it. So, before you start, take the time to cover areas susceptible to overspray (like sidewalks, driveways, and vegetation) with painter’s tape or drop cloths. This will help ensure crisp lines and will make cleanup a breeze.
Do Try to Coat One Thing at A Time:
Many first-time DIYers make the mistake of trying to tackle their entire driveway in one go—but that rarely ends well. Not only is it difficult (not impossible) to reach every nook and cranny while working alone, but also by trying to do too much at once. Chances are good that some areas won’t get coated evenly (or at all).
,So the best advice from our experts is to focus on one section at a time and take frequent breaks. That’s so that you AND your material don’t overheat in direct sunlight (which can cause premature drying and produce an inferior finish). Our rule of thumb for seal coating is to work on no more than 500 square feet at a time per gallon of sealer applied. Exceed any more than that, and it becomes difficult to achieve consistent coverage without running out halfway through (or worse—wasting material).
Don’t Hasten the Drying Process:
Allow the sealer to dry before driving or walking on it for at least 24 hours for foot traffic and 48-72 hours for cars, trucks, RVs, etc. If you get impatient and try to use the space too soon, you’ll track tire marks and footprints all over your fresh seal coat job.
Conclusion:
Seal coating your asphalt lot can save you a lot of money—but only if it’s done correctly. Following these key dos and don’ts ensures that your project looks great and lasts for years.
However, if you are doubtful, it is preferable to get professional assistance!
Purcell’s Paving and Masonry, serving Warren, NJ, provides the best seal coating treatments to preserve your asphalt and keep it looking good for years. Our procedure is quick, simple, and inexpensive, allowing you to get the most out of your pavement without breaking the bank.
Key takeaways:
- A driveway footprint helps to determine the amount of gravel needed for the job
- The excavation process begins with the removal of topsoil
- Once the subsoil is reached, the gravel is excavated
- Multiple layers of gravel may be necessary to achieve the desired thickness
- Only a professional excavation contractor should be hired to complete the job
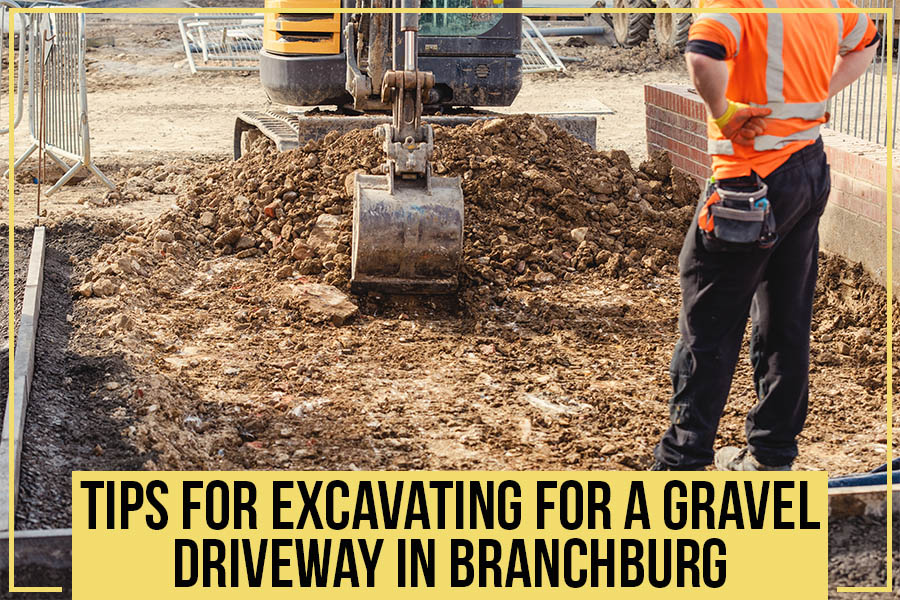
You’ve finally saved up enough money to buy a house in the country. The perfect country home includes a gravel driveway. But there’s one problem: you don’t know how to excavate a gravel driveway. Do you need a backhoe? A bulldozer? How deep should the hole be? What kind of equipment do you need to rent? And how much gravel do you need to order?
If you’re excavating for a gravel driveway in Branchburg, never fear! Here are some tips from your friends at Purcell’s Paving and Masonry.
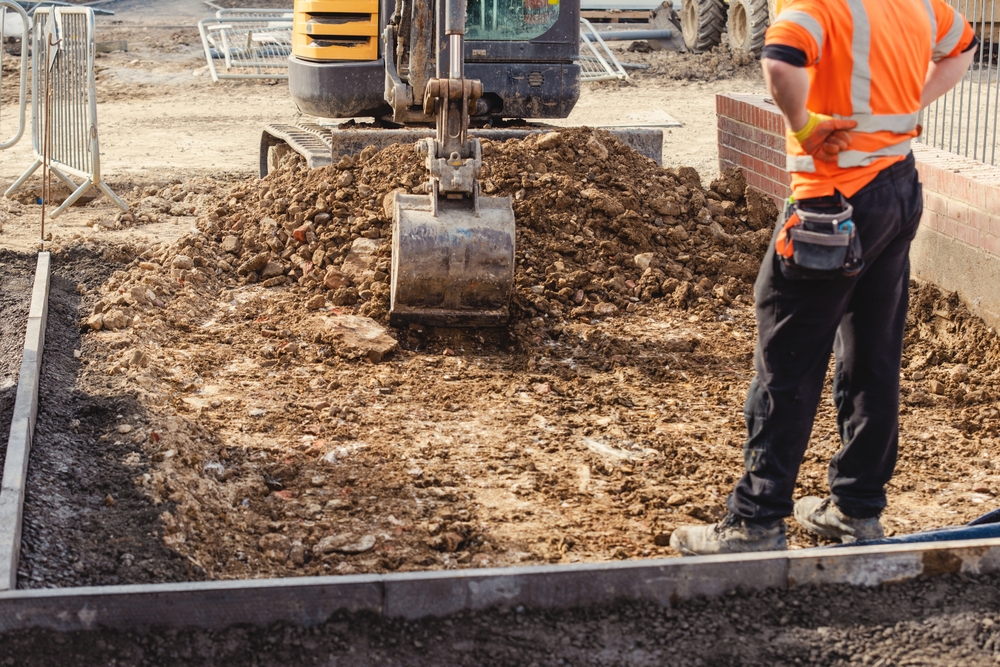
1. Begin with Excavating the Driveway Footprint
The best strategy would be to hire an excavation contractor due to their experience and expert knowledge. The need for heavy equipment also makes it necessary to do so.
Whichever path you take, footprint excavation is the first and foremost task. This involves clearing the ground of obstacles, such as grass, stumps, large rocks, and other objects that can get in the way. It would be best to remove at least 8 to 10 inches of topsoil for a gravel driveway. However, a recommended strategy is to ensure the depth is the same as the thickness.
2. Consider the Land’s Soil
Your property’s soil has much to do with the gravel driveway excavation process. The kind of earthmoving equipment that will be used during the excavation is dependent on the soil’s composition. For instance, a backhoe might be the best excavation tool if the soil is too hard. If the ground is too soft, an excavator will suffice.
Whether your soil is silty or clay material, and whether it’s gravel or sandy, all of these details matter a lot. A contractor will be able to properly assess your land and determine the best driveway excavation process for you.
3. Subgrade Preparation
After stripping the land of all unwanted materials, it is time to test its strength. Your excavation contractor will “proof-roll” the site with a heavy machine to test the subgrade’s ability to support the gravel driveway.
If the subgrade is too weak, gravel will eventually sink into the soil, causing dips and depressions. The contractor will probably recommend adding stone or other materials to improve the strength of the subgrade.
Sometimes, adding a crown to the driveway (higher in the center than at the edges) will also facilitate drainage.
4. Geotextile Placement
Geotextile filter fiber is placed over the subgrade to keep gravel from sinking into the soil. The contractor will unroll, cut the fabric to fit, and then secure it with gravel or soil staples.
The addition of geotextile also depends on the soil you’re dealing with. For example, clay is often regarded as “bad” soil because it doesn’t allow water to pass through readily. Adding geotextile, in this case, can help you avoid problems down the road. However, these requirements are not always necessary in the case of sand or gravel.
5. Don’t Forget Driveway Edging
Without adequately defined borders, you cannot have a gravel driveway. The gravel will inevitably spill over your lawn, creating an unsightly and difficult-to-maintain mess. Driveway edging comes in various varieties, including concrete, plastic, metal, brick, and stone. Choose the material that best suits your needs, style, and budget.
With driveway edging, you can prevent the gravel from moving around, and your excavation will look neater and better organized.
6. Multiple Layers of Gravel
When excavating for gravel, you need to make sure that you create multiple layers. The gravel should be four inches deep, with the bottom layer being the most significant gravel piece. The second layer should be smaller gravel pieces, and the top layer should have the tiniest ones.
People opt for multiple layers to increase sturdiness and minimize gravel movement. By having multiple layers, you are less likely to have gravel pieces sink into the ground and create an uneven surface.
7. Consider the Weather
One crucial factor to consider when excavating for gravel is the weather. If it rains a lot, the ground will be softer and wetter, making excavation more difficult. Now, remember what we said about the soil particular to your property. Suppose the soil is already loose and sandy. In that case, you may consider postponing your gravel excavation until the ground has dried out.
8. Make Sure You Have the Right Equipment
Driveway excavation is not a DIY job, at least not if you want it done right. Not only do you need the right tools for the job, but you also need the experience and the know-how to use them. Professionals require machinery ranging from hand tools to hydraulic excavators, depending on the size and scope of your gravel driveway project.
9. Know Where to Put the Dirt
After excavating your gravel driveway, you will have a lot of dirt left over. Which is why having a plan for where to put it is essential. One option is to use it to build up the sides of your driveway, creating a berm. By doing this, you can reduce how much gravel you need for your driveway and also help to control runoff.
10. Trust Only a Professional
Excavating your driveway is no joke. And now that you understand that it’s not a DIY project, you need to find a reputable excavation contractor to do the job. We recommend getting multiple references before you decide on a company.
Ending Note:
If you’re looking to install a gravel driveway in Branchburg, these tips should help make the process go as smoothly as possible. By excavating correctly and using the right materials, you can avoid some of the most common problems people experience. So, if you’re ready to start your new driveway, follow these tips!
We’re Your Friendly Excavation Contractor in Branchburg
At Purcell’s Paving and Masonry, we have the skills, experience, and materials to expertly complete your gravel driveway excavation in Branchburg, NJ. We also have the right team of experts to help you choose what gravel is best for your project and to excavate your land properly.
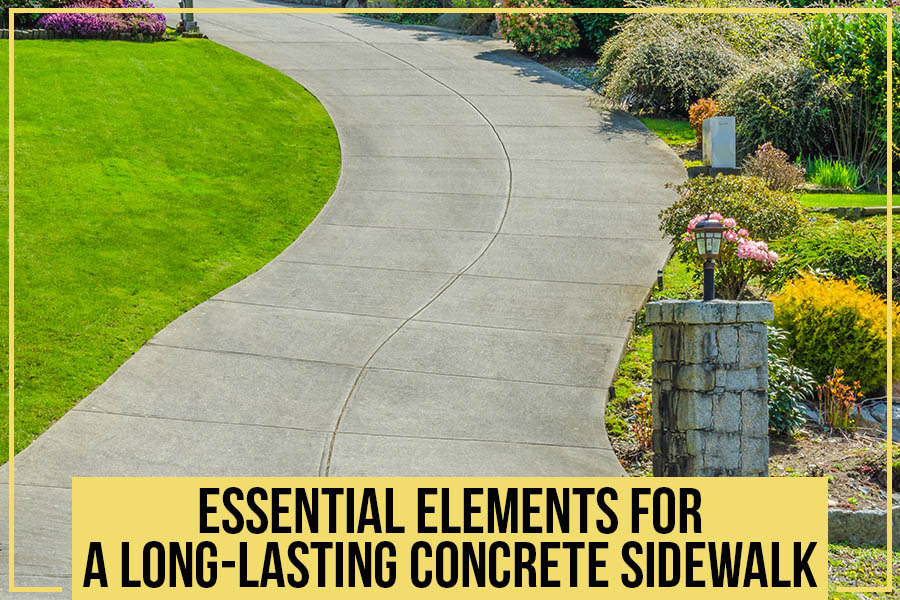
Key Takeaways:
- Several elements must be considered to build a long-lasting concrete sidewalk.
- The foundation must be prepared appropriately.
- The right mix of concrete must be used.
- The concrete must be properly placed and compacted.
- The finishing process is critical.
- Regular maintenance is vital.
- Purcell’s Paving and Masonry offer seal paving and masonry services to customers in Bridgewater, NJ, and the surrounding areas.
Several elements should be considered when installing a sidewalk to ensure it is done correctly. If you’re unfamiliar with the process, it can be challenging to know where to start. Purcell’s Paving and Masonry will discuss the critical considerations for a long-lasting concrete sidewalk. Following these guidelines, you can create a safe, beautiful sidewalk that will last for years!
Factors to Consider When Choosing Concrete
Choosing the correct type of concrete for your project is essential. There are many types of concrete, each with advantages and disadvantages. You’ll need to consider factors such as climate, foot traffic, and budget when choosing the right kind of concrete for your sidewalk.
1. The Climate in Your Area
The first element to consider when choosing concrete for your sidewalk is the climate in your area. If your area experiences many freeze-thaw cycles, you’ll need to select a concrete that is more resistant to freezing and thawing. On the contrary, if you live in a hot, dry climate, you’ll need to choose a more resistant concrete to crack and dry out.
2. The Size and Traffic Requirement
The size of your sidewalk is also an important consideration. If you have a large sidewalk, you’ll need to choose concrete that can withstand the weight of heavy foot traffic. Alternatively, if you have a small sidewalk, you may be able to get away with lighter-weight concrete.
3. Your budget
Of course, your budget is one of the most important factors to consider. Concrete comes in a wide range of prices, so it’s essential to find one that fits within your budget. Note that cheaper concrete is less durable and prone to cracking and other problems.
4. The Look You Want
Another factor to consider is the look you want for your sidewalk. Concrete comes in a wide range of colors and finishes, so you can find one that matches the look you want. Remember that some finishes are more prone to fading and chipping than others.
Once you’ve chosen the suitable concrete, you must ensure it’s properly mixed. If the concrete isn’t blended correctly, it could weaken the sidewalk and cause it to crack or crumble over time.
After the concrete is mixed, it must be poured and smoothed out so there are no bumps or uneven areas.
When the concrete has cured, you can add any finishing touches, such as stamps or stencils. You can also add pigment to the mix to make the surface colorful or stain the surface after it’s cured.
Also, read our blog on Belgian block ideas for creating well-defined outdoor spaces.
5. Foundation
One of the essential elements of a concrete sidewalk is the foundation. The foundation must be strong enough to support the weight of the concrete and any traffic that will be using the sidewalk. Without a strong foundation, your sidewalk could crack or collapse over time.
6. The Right Mix
One of the essential elements of a concrete sidewalk is the right mix. The mix should be designed for the specific application and climate. For example, a sidewalk in a cold environment needs a different combination than a sidewalk in hot weather. The mix should also be designed for specific soil conditions.
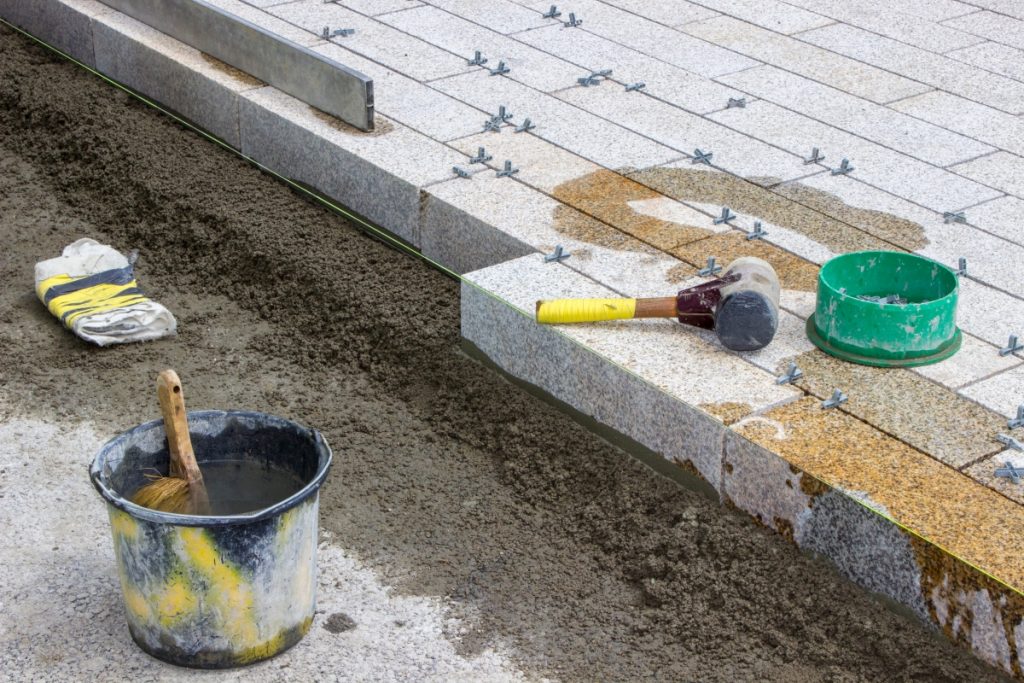
7. Proper Formwork
The formwork is the mold that is used to shape the concrete. It must be solid and level to set the concrete correctly.
8. Thickness
The consistency should be at least four inches thick to provide strength and durability.
9. Adequate Drainage
Adequate drainage is critical for a concrete sidewalk. It is essential to ensure that water does not pool on the sidewalk’s surface, as this can lead to cracking and damage. Adequate drainage also helps prevent ice from forming on the sidewalk’s surface, creating hazardous conditions for pedestrians.
10. The Right Slope
The slope should be such that water drains away from the sidewalk and does not pool on it. A common mistake is to make the slope too steep, which can cause problems with drainage.
11. Smooth Surface
A smooth surface is another essential element for a concrete sidewalk. A smooth surface helps to prevent trip hazards and makes it easier for pedestrians to walk on the sidewalk. You should also ensure that the sidewalk’s surface is level, as uneven surfaces can create trip hazards.
12. Appropriate Width
The width of a concrete sidewalk is also an important consideration. It should be wide enough to accommodate pedestrian traffic but not so vast that it becomes difficult to maintain or clean. Additionally, sidewalks should be designed to not encroach on private property or public rights-of-way such as streets or alleyways.
13. Proper Reinforcement
Another essential element of a concrete sidewalk is reinforcement. Reinforcement helps to increase the strength of the concrete and prevent cracking. Common reinforcement materials include steel rebar or wire mesh.
14. Curing
Curing is a necessary process that helps to ensure that the concrete sets properly and develops its full strength. Curing involves keeping the concrete wet for some time after it has been poured to hydrate correctly. Without curing, the concrete will be weaker and more susceptible to cracking.
15. Finishing
After completing the curing process, you must finish the concrete properly. It involves troweling or power floating the surface to create a smooth, level finish. Finishing also helps to prevent scaling, which is when the surface of the concrete breaks away from the body due to freezing and thawing cycles.
16. Sealing
Sealing helps to protect the concrete from weathering and staining. It also makes it easier to clean and helps to prevent freeze-thaw damage. Sealing should be done after finishing and before any traffic is allowed on the sidewalk.
17. Regular Maintenance
Regular maintenance is another essential element for a concrete sidewalk. The sidewalk should be cleaned regularly to remove dirt, debris, and stains. You should repair any cracks or damaged areas promptly to prevent further damage.
Also, check out the best practices for the concrete sidewalk.
Need Masonry and Paving Services in Bridgewater, NJ?
Purcell’s Paving and Masonry, serving Bridgewater, NJ, can help if you need some concrete work done. We provide high-quality concrete work for both residential and commercial properties. We also offer custom paving and masonry services to look perfect for your property. So, call us if you’re looking for a new sidewalk, driveway, or patio. We will give you a free estimate to show you what we can do!
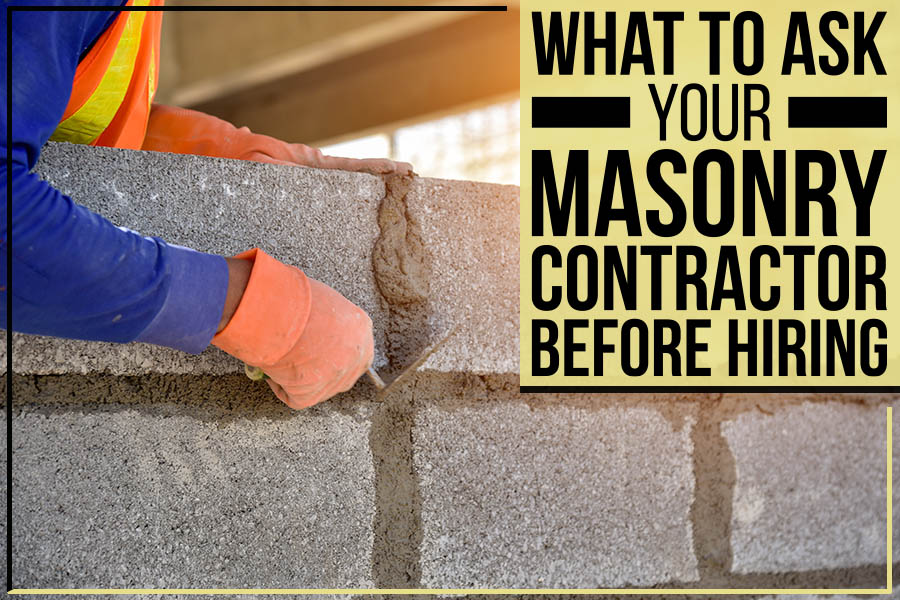
What To Ask Your Masonry Contractor Before Hiring
Key Takeaways:
– Asking the right questions before hiring a masonry contractor can save you time, money, and headaches down the road.
– Be sure to ask about the contractor’s experience, licensing, insurance information, and process for handling repairs.
– Get multiple estimates before making your final decision.
Planning to get some masonry work done? Since masonry work is notoriously expensive and time-consuming, you must find an expert and highly experienced contractor for your project.
But before you start interviewing contractors, you should know a few things. Purcell’s Paving and Masonry cares about your masonry repair project in Watchung, NJ. Therefore, we want to ensure you have all the information you need to make the best decision for your home.
Here are a few things to ask your masonry contractor before hiring:
1. Are you licensed?
A licensed business means a safe transaction, so you must ask your masonry contractor if they have a license. Review their business license and make sure it’s real and not fake. Fraudulent contractors have been known to create counterfeit authorizations, so always be sure to check before falling for a scam.
2. Do you have liability insurance?
Liability insurance means that your contractor is protected against any damages to your property during the repair process. Assuming that something goes wrong, you want to be sure that your contractor’s insurance will cover the costs of the repairs. The last thing you want is to be stuck with a hefty bill because your contractor wasn’t insured.

3. Do you have a clearance certificate?
Some states require masonry contractors to have a clearance certificate to work on properties. This certificate proves that the contractor has undergone a background check and is cleared to work on your property. Check with your state’s requirements to see if this is something you need to verify before making a final deal with a contractor.
4. Do you have a health and safety policy?
Not all employers have a formal health and safety policy, but it’s always good to ask. After all, you want to be sure that your contractor is taking the necessary precautions to protect you, your family, and your property. If the contractor does not have a formal policy, you can inquire about what kind of safety procedures they follow.
5. Can you provide a supplier endorsement?
You’re not alone if you’re wondering what a supplier endorsement has to do with hiring a masonry contractor. A supplier endorsement is a statement from the company that supplies the bricks, mortar, and other necessary materials for construction. It endorses and recommends the contractor who will be doing the work. It’s a way for the supplier to vouch for the contractor, and it’s an essential step in getting approval from the city or county to do the work.
6. Do you have a permanent place of business?
Remember that you want a trusted business, not nomads. Ask the contractor if they have a permanent place of business. You might wonder, “But I don’t need to visit them. Why does it matter?” Well, if they don’t have a place of business, it may be because they’re not well established.
7. Can you provide consumer protection endorsement?
Make sure the Consumer Protection Agency endorses general contractors. Through such an endorsement, you can be sure that the contractor is reputable and has a good track record. It is also a sign that customers in the past have had better things to say about the contractor. You will be protected if they fail to deliver what they promise.
8. What is your experience?
Your masonry contractor’s experience will matter a great deal. It’s always better to go with a contractor who has been in the business for many years and has handled projects similar to yours. What even matters more is their experience with the particular type of project you are planning to undertake. For example, if you want your brick chimney repaired, you would like to go with a contractor with experience repairing brick fireplaces.
9. Do you offer a warranty?
You ask your potential masonry contractor to put their money where their mouth is by asking for a written warranty policy. This will give you some mental relaxation knowing that they will stand by their workmanship should any problems arise.
10. Can you provide references?
References and recommendations go a long way in helping you decide whether or not to hire a masonry contractor. Now don’t merely rely on the contacts provided by the contractor themselves, be sure to do some digging and get in touch with some of their past clients to get an honest opinion. An easy way could be to search online reviews on Google.
11. Can you show some photos of completed projects?
You can’t just rely on the contractor’s word that they’re good at their job. You’ll want to see some proof. Ask to see before and after photographs of past projects, or even better, visit one of their job sites and see the work for yourself.
12. Can you give me the proof of tax number?
A tax number is essential to show that the contractor is legitimate and has all their paperwork in order. You can ask if you feel something is amiss, but most reputable contractors will have no problem providing this information.
13. What kind of masonry work do you provide?
You’ll want to ensure that the general contractor you hire can do the job you need. Ask about their specific services and what kinds of masonry work they can provide.
Ending Note:
Hiring a masonry contractor is a big decision, so you’ll want to make sure you ask precisely what you should do before signing on the dotted line. With these essential questions, you can rest assured that you’re not making a misstep.
General Contractor in Watchung, NJ
Purcell’s Paving and Masonry, serving Watchung, NJ, and the surrounding areas, is a fully licensed and insured masonry contractor specializing in all aspects of paving and masonry work for commercial and residential customers. We offer an expansive variety of services to meet your needs, including but not limited to masonry work, chimney repair, asphalt paving, and concrete sidewalks.
Key Takeaways:
- Residential excavation is an extensive job; you want to ensure it’s done right.
- There are a few key things you should ask your contractor for residential excavation before hiring.
- You should always ask for: their license, insurance, warranty, and an estimate. Other than that, ask for referrals and experience. These are all essential questions that will assist you in making your decision.
- Make sure you understand everything before signing any contracts.
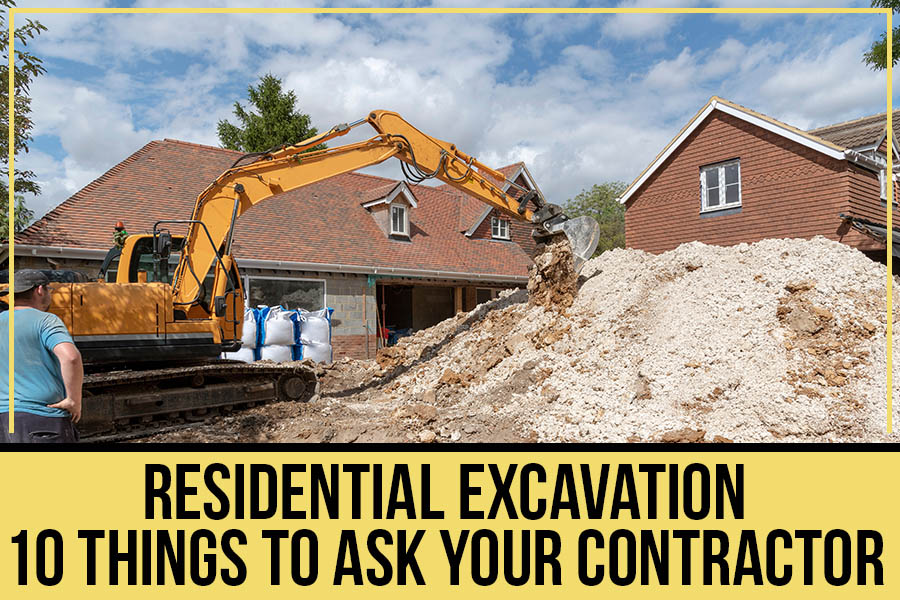
Are you looking for a contractor to do residential excavation? If so, it’s essential to know what to ask them before you hire them. In this blog post, Purcell’s paving and masonry lists ten questions you should ask any contractor offering residential excavation services. By knowing what to ask, you can be sure that you are getting the best possible service for your money!
What is residential excavation?
Residential excavation removes earth and rock from property to make way for new construction. This can include clearing land for a new home or digging a foundation for an addition. Excavation contractors are responsible for operating the heavy machinery that is needed to complete the job, as well as managing any workers who are helping with the project.
Why hire professionals for residential excavation?
There are a few reasons why hiring professional contractors for excavation is always best rather than trying to do the job yourself. First of all, excavating land is very difficult and dangerous work. If you are not experienced in operating heavy machinery, you could seriously injure yourself or someone else. Secondly, professionals have the knowledge and experience necessary to complete the job quickly and efficiently. Finally, hiring a professional contractor will save you money in the long run, as they will be able to get discounts on equipment and supplies.
Ten things to ask your contractor for residential excavation
Question 01: Do you have a license?
The first question you should ask any possible excavation contractors is if they are licensed, certified, and insured. Although not required in every jurisdiction, you should ensure the team you select has the skills and expertise necessary to do the task. Additionally, you should confirm that they have insurance coverage in case something goes wrong. Don’t just believe what they say, either. Before selecting your excavator or any other contractor for your project, get documentation of these credentials and insurance.
Question 02: How much experience do you have?
How long has your company been around? How long have you been engaged in residential excavation? Both of these questions are excellent for your prospective excavator.
Excavation is a delicate process, and you don’t want your home to be the one they practice on. A team with a lot of experience is eager to flaunt their abilities.
Ensure that the team you select is equally skilled and that the person you hire has years of expertise. No crew is equally proficient just because the excavation contractor in charge of the job has a lot of expertise.
Question 03: What similar projects have you completed?
Always request references from earlier work, including examples. A business that frequently completes these types of projects will have no trouble providing you with references from prior clients.
Additionally, investigate if there are any reviews or references of the contractor online. Select an excavator whose reputation is excellent and with whom you feel comfortable discussing your project.
If the excavator you’re considering employing hasn’t worked on a similar project, you might want to reconsider. Maybe you need a large residential house, but they have only worked on commercial excavations. They provide decent work, yet they lack the expertise you want for your job. To be sure, ask.
Question 04: Will you provide a project timeline?
Be sure to ask for a detailed timeline of the project. This will help you set your expectations and also allow you to plan around the construction. Additionally, enquire about any potential delays that could occur and how they would be handled. A reputable contractor will have no problem providing you with a realistic timeline and contingency plan.
Question 05: Which training and certifications does your team have?
Residential excavation can be dangerous, so you want to ensure that the contractor and their team are properly trained. Ask about their safety policies, procedures, and certifications or training. A good contractor or excavator will gladly share this information with you.
Question 06: Ask for an estimate
If the excavating contractor you’re working with gives you a verbal cost estimate, request a written estimate. Ask them to list any potential additional expenses and their associated prices in the estimate. When working on a significant residential project, get everything in writing. If your initial budget is off, you’ll spend the remainder of your construction attempting to make up for it.
Question 07: Is cleanup included?
Most excavation contractors will clean up after themselves. However, you should always confirm this before work begins. If they don’t offer cleanup services, ask about the cost of renting a dumpster or hauling the debris away yourself. Residential excavations can create significant waste, and you don’t want it sitting around your property.
Question 08: What are your hours of operation?
This is an important question, especially if you have neighbors who might be affected by the noise. Most contractors will work during regular business hours, but some may start earlier or work later to avoid rush hour traffic.
Question 09: Do you provide additional services?
Some excavation contractors also offer demolition services. If you’re planning on demolishing an old shed or garage, it may be more cost-effective to hire a contractor who can do both the excavation and demolition.
Question 10: What is your warranty policy?
Be sure to ask about the warranty policy before work begins. Most reputable contractors will offer a warranty on their workmanship. If something goes wrong with the excavation, you should be able to get it fixed at no cost to you.
Asking your contractor these ten questions will help ensure that you have a smooth and successful excavation project. Residential excavation can be a big undertaking, but it can be a breeze with the right contractor.
Contact Purcell’s Paving and Masonry; we are a full-service paving and masonry firm. We have been in operation for a long time and have finished jobs of various kinds in Long Hill, NJ. We constantly prioritize our clients and put out great effort to ensure they are happy with the results.
Connect with us


Categories
From Excavation to Construction & Paving, We’re Your Friendly One-Stop Shop!
Providing a Full Range of Masonry and Paving Services in Bridgewater, New Jersey. Satisfaction Guaranteed!
Purcell's Paving and Masonry
-
778 Harding Road
Bridgewater, NJ 08807 - Mike (Owner) 908-906-0564
- purcellpavingmasonrynj@gmail.com
Our Services
Hours of Operation
| Monday | 7:00AM - 7:00PM |
| Tuesday | 7:00AM - 7:00PM |
| Wednesday | 7:00AM - 7:00PM |
| Thursday | 7:00AM - 7:00PM |
| Friday | 7:00AM - 7:00PM |
| Saturday | Closed |
| Sunday | Closed |
License#
Home improvement contractor 13VH09365200